

A bracket that has worked loose doesn't announce itself politely. It shows up as a half-inch of play at the top of the rail, a click every time someone grabs it, and a slow oval-shaped gouge in the finish where the rail has been rubbing against the plate. I've chased that rattle on three installations now, and each time it turned out to be something different — which is exactly why a proper troubleshooting order matters.
This guide is about the riding rail kit specifically: the sliding or cantilever-style rail system where a carriage runs along a fixed track and the whole thing hangs on a handful of adjustable brackets. Those brackets are the weak link, and they're also the easiest part to diagnose if you know what you're looking at.
Key Takeaways
- Isolate the movement before you tighten anything. Push the rail, not the handrail — a bracket problem and a fastener problem feel almost identical from the wrong direction.
- Sequencing beats torque. Snug the brackets in a staggered pattern, never fully tighten one corner first.
- Most "loose bracket" calls are actually wall anchor failure, not bracket failure. The plate is fine; what it's bolted into has given up.
- Replacing a stripped bracket screw with a longer one is a temporary fix at best — and a dangerous one if you overshoot into a hollow cavity.
- A wobble that returns within a month means you treated the symptom. Go back to the substrate.
Why riding rail kit brackets work loose in the first place
A riding rail bracket carries load in three directions at once. It holds the rail in suspension, resists the sideways pull when someone leans, and absorbs the small repeated jolts of daily use. That's a lot to ask of a plate held by four screws.
The failure mechanism is almost always the same: micro-movement. Not enough to see, enough to work a fastener loose over a few thousand cycles. Wood shrinks and swells with the seasons, so a bracket that was tight in October is loose by April. Metal-to-metal brackets on a vinyl or aluminium rail don't have that seasonal breathing, but they get vibration instead.
The three failure modes you'll actually encounter
Rather than guessing, run through these in order. In my experience the split runs roughly 60/25/15.
- The fastener has backed out. Screw or bolt is intact, threads are fine, it has simply rotated loose. Tighten and monitor.
- The substrate has failed. The screw is tight but spins. Wood has rotted, concrete has crumbled, the anchor sleeve has wallowed out its hole. This is the big one.
- The bracket itself is deformed or cracked. Usually from an overload event — someone hanging on the rail, a ladder leaned against it. You'll see a hairline crack at the bend radius or a visibly opened mounting hole.
Third one is the rarest and the only one where the part is the problem. Which is worth remembering before you order a replacement kit.
The diagnostic sequence: find the loose bracket in five minutes
Here's the check I run. You need one hand and no tools.
Grip the rail about a third of the way along its span and push it away from you, then pull it back. Watch the bracket plates, not the rail. If a plate lifts off its mounting surface as you pull, that bracket is the culprit. If the plate stays flat against the wall or post but the whole assembly rocks, the problem is downstream at the anchor.
Reading the gap
A visible gap under the plate that opens and closes as you load the rail — that's a backed-out fastener or a compressed washer. A gap that's constant and doesn't change under load — that was installed badly from day one, or the surface behind it isn't flat.
Constant gaps are the ones people miss. They tighten the bracket, it feels solid, and then it wobbles again in a week because the plate was never seated. Shim it or dress the surface. You cannot torque your way to a flat seat.
Which end is moving?
Loose brackets rarely announce themselves at the end that feels loose. Load transfers along the rail. If the far end of a span feels sloppy, check the bracket at the near end first — that's the one taking the moment.
And the worst part? On a long span, the movement can be entirely at a mid-span bracket that you can't see from where you're standing. Walk the rail. Push at four or five points along its length and note where the movement originates.
How to tighten a loose metal railing without making it worse
Once you've found the bracket, the tightening itself is straightforward — but order matters more than force.
Bring all fasteners to finger-tight first, working in a staggered pattern (top-left, bottom-right, top-right, bottom-left for a four-hole plate). Then torque in the same sequence, in small increments. Tightening one corner to full spec while the others are loose tilts the plate and puts the load on a single fastener, which is exactly how you get a cracked bracket six months later.
What torque to actually use
Most riding rail kit brackets with M6 stainless hardware sit somewhere around 8 to 12 Nm. M8 goes higher. If the kit came with a spec sheet, use it — that number exists for a reason and it's usually printed in a table nobody reads.
No spec sheet? Tighten by feel until the plate stops compressing, then a quarter turn. If you're compressing a nylon washer visibly, you've gone too far. Stainless into aluminium is a galling risk, so a dab of anti-seize on the threads is cheap insurance.
When tightening doesn't hold
If a fastener reaches torque and then goes soft — keeps turning with no resistance — stop. You've stripped either the thread or the substrate. Back it out and move to the anchor repair below. Continuing to turn just enlarges the hole and makes the eventual repair harder.
I learned that one on a concrete wall where I chased a spinning Tapcon for a solid ten minutes before accepting reality. The hole went from 6mm to something closer to 9mm. The epoxy fix I ended up doing would have worked fine on the original hole.
How can I fix a wobbly deck railing?
The fix depends on whether the wobble is in the rail or in the post, and the two require completely different approaches. Grip the post and shake it. If the post moves, no amount of bracket tightening will help — you're looking at a post base problem, which means pulling the base plate and addressing the anchor into the deck framing.
If the post is solid and only the rail moves, you're back in bracket territory. Tighten the bracket fasteners, check that the plate seats flat, and confirm the rail hasn't drifted out of alignment in its channel.
The post-base case, briefly
A deck railing post that rocks usually has one of two problems: the lag screws into the rim joist have corroded or pulled, or the post base was installed without blocking behind it. You can reinforce with a through-bolt and a backing plate, but if there's nothing solid behind the rim joist, no fastener in the world will fix it. Add blocking. It's more work and it's the only real answer.
Check the base plate for rust staining at the fastener heads. That's your tell for hidden corrosion — the screw head looks fine but the shank is half gone.
How to fix a loose railing bracket in concrete
Concrete anchors fail in a specific way: the hole wallows out, the anchor loses its grip, and the fastener spins. The temptation is to go up a size. Resist it for a moment and consider epoxy instead.
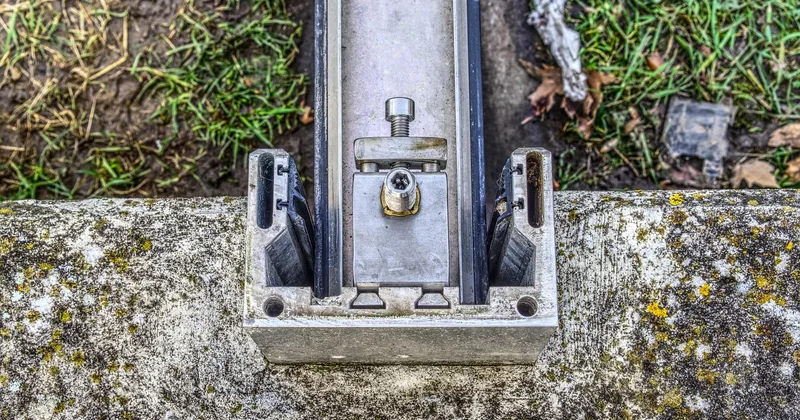
Clean the hole thoroughly — a brush and compressed air, not just a puff — then inject two-part anchoring epoxy and set a threaded rod or a fresh anchor into it. Full cure before you load it. I've had anchors that had failed twice hold solid for years after an epoxy reset, on the same hole.
The alternative is a mechanical sleeve anchor sized up, which works but leaves you with a bigger hole if it also fails. Epoxy is the more forgiving route in my opinion, and I'll take forgiving over clever any day on a repair like this.
Common questions about loose rail brackets
How to fix a loose banister railing?
Interior banisters usually attach to the wall through a mounting flange, and the failure is often behind the drywall rather than at the bracket. If the flange is tight and the handrail still moves, the fasteners have pulled out of the stud or — more likely — never reached one. A toggle anchor or a proper blocking plate behind the flange solves it. Tightening the visible screws when the anchor is spinning in plasterboard achieves nothing except a bigger hole.
How to tighten cable deck railing?
Cable systems have their own loose-bracket problem: the tension in the cables pulls the end posts inward over time. If the brackets at the terminal posts are showing movement, tightening them without first releasing cable tension just loads the fasteners against a force they weren't sized for. Slacken the cables, re-seat and torque the brackets, then re-tension. Check the tensioner hardware at the same time — a stretched cable and a loose bracket feel similar from the handrail.
How to tighten vinyl railing?
Vinyl is the one material where over-tightening does real damage. The brackets are usually fastened through a hollow section, and cranking a screw compresses the vinyl wall until it cracks. Use the lowest torque that holds, add a backing block inside the hollow section if you can access it, and check whether the bracket has a designed slip joint — some vinyl systems are meant to float slightly to allow for thermal expansion. A rail that moves a few millimetres seasonally is working as intended.
Which repair actually holds?
| Repair approach | Best for | Expected durability | Effort |
|---|---|---|---|
| Re-torque fasteners in sequence | Backed-out screws, sound substrate | Good if substrate is intact | Low — minutes |
| Longer or larger fastener | Shallow pull-out in solid wood | Temporary; often fails again | Low |
| Epoxy anchor reset | Wallowed concrete holes | Long-lasting in my experience | Medium — needs cure time |
| Backing plate or added blocking | Hollow sections, thin substrates | Best long-term result | High — access dependent |
| Bracket replacement | Visible cracking or deformation | Good, but only if the cause is the part | Medium |
The pattern in that table is uncomfortable but honest: the repairs that last are the ones that address what's behind the bracket. Everything else buys time.

When to stop repairing and replace the bracket
Look closely at the bracket plate itself before you spend another hour on fasteners. Run a thumbnail along the bend radius. A hairline crack there means the part has been cycling under load and has started to fatigue — no amount of tightening brings that back, and it will keep opening.
Same for an elongated mounting hole. If the hole that was round is now an oval, the bracket has been moving against its fastener for a long time, and the next fastener will just wallow it out again. Replace it.
And if you've tightened the same bracket three times over a couple of seasons and it keeps coming back — stop tightening. Something in the assembly is moving that shouldn't be moving, and it isn't the screw. Usually it's alignment: the rail sitting slightly off-axis in its channel, loading the bracket sideways with every pass of the carriage. Fix the alignment and the bracket stops working loose.
That's the thing about a rattle. It's never really about the noise. It's about the load path nobody looked at because the screw was right there and it was easy to reach for a wrench.


