

You just got your car back from the body shop, and something feels wrong. The steering wheel sits a few degrees off-center. The car pulls left at highway speed. And when you look under the front end, the riding rail kit — the mounting hardware that anchors your suspension and holds your ride height geometry — no longer sits where you remember it.
That last detail is the one most people miss. A collision doesn't just bend body panels. It moves the reference points your entire front-end geometry depends on, and if those rails aren't aligned before you touch camber or toe, you're aligning a car that's leaning on a crooked foundation.
Below are the alignment tips I've picked up working on collision-repaired vehicles, focused specifically on getting a riding rail kit back into spec and then getting the actual wheel alignment right afterward.
Key takeaways
- Riding rail alignment comes first. Wheel alignment is meaningless until the rail kit and frame reference points are back in spec.
- A collision can absolutely knock alignment out of spec, even if the wheels were never directly hit.
- Follow the OEM adjustment order: caster, then camber, then toe. Reverse that and you'll undo your own work.
- Measure before and after pulling — never during. Continuous measurement during a pull gives you garbage numbers.
- Check for kinks, not just bends. A kinked frame rail is a replacement decision, not a straightening job.
Why riding rail kit alignment matters after a collision repair
Here's the thing most DIYers and even some shops get backwards: they bolt the suspension back on, roll the car onto an aligner, and try to dial in camber and toe. If the riding rail kit isn't sitting square to the vehicle's centerline, every number the aligner prints is fiction. You'll chase the same toe reading three times in one afternoon and never figure out why it keeps drifting.
The riding rail kit is a structural anchor point. It sets the relationship between the subframe, the control arm pivots, and the chassis. Move it a few millimeters off and you've changed the effective geometry of the whole corner. Camber that "should" be in spec reads out of spec. Toe that should sit at zero shows a phantom pull. The rail kit isn't a bolt-on accessory — it's a datum reference.
Check for kinks, not just bends
A bend can be straightened. A kink cannot. This is the single most important distinction when you're evaluating a damaged frame rail or mounting rail after a hit.
A bend has a gradual radius. A kink is a sharp crease where the metal has folded on itself. Once a section has kinked, the tensile strength in that area is compromised, and no amount of pulling will restore it. That section needs to be sectioned out and replaced with OEM-spec metal, welded per the manufacturer's sectioning procedure.
Lay a straightedge along the rail. If you can slide it and it rocks over a sharp crease, stop. You're not pulling that out. Replace it.
How to straighten frame horns
Frame horns — the forward extensions of the frame rails where the bumper and crash structures mount — take the brunt of a front-end hit. Straightening them is a controlled pull on a frame bench, not a hammer-and-jack operation. Here's the sequence that actually works.

- Secure the vehicle properly. Anchor points at the OEM-designated hold-down locations. Skip this and you'll move the whole shell instead of pulling the horn.
- Record baseline measurements at every OEM control point before you touch the pull chains.
- Attach the pull at the correct angle. Frame horn pulls usually want a forward-and-slightly-outward vector. Wrong angle shears the horn sideways and creates new damage.
- Pull in short, measured increments. Ten to fifteen millimeters at a time, then stop, release tension, and re-measure.
- Re-measure only after the pull is released. Measurements taken while the chain is still loaded are meaningless — the metal springs back.
You repeat that cycle until the horn lands within the OEM tolerance. In most modern unibody vehicles, that tolerance is a few millimeters at the control point — not the "close enough" of twenty years ago. If you can't get within spec after three or four pulls, stop and diagnose. Something is resisting, and pulling harder will kink the rail.
Why continuous measurement during a pull fails
I've watched people keep a tape measure or laser rig on the frame horn while the pull is actively loaded. It feels rigorous. It isn't. Steel under tension reads long. When you release, it moves back. If you chase the "loaded" number, you'll overshoot the pull and end up with a stretched rail.
Measure the at-rest geometry. Every time.
Which is the correct order of adjustments when performing an alignment?
Caster first, then camber, then toe. That's the order, and it's the order because each adjustment interacts with the next.
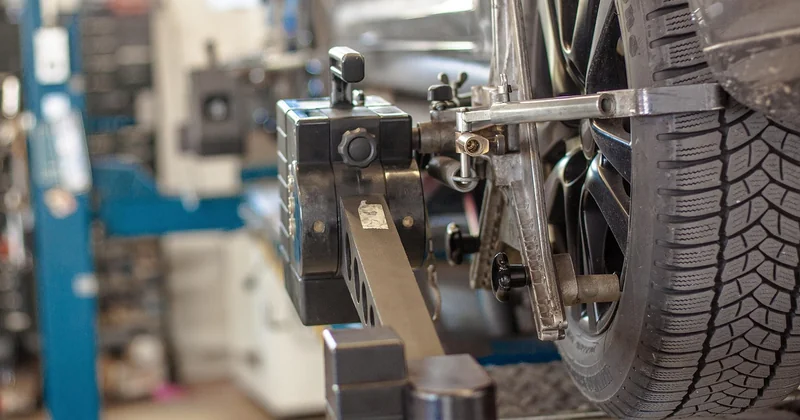
Caster is set at the strut or upper control arm and it changes the steering axis angle. Adjusting caster shifts the camber reading on many suspension designs. Set camber before caster and you'll have to redo camber anyway.
Camber tilts the wheel in or out at the top. Moving camber changes the toe angle because the tie rod end sweeps through an arc as the suspension moves. Every camber change nudges toe.
Toe is last because it's the most sensitive and the one you want to lock in without disturbing anything upstream. Set toe after caster and camber are locked, and it stays put.
One more thing: check the OEM specs for the specific vehicle before you start. Some modern platforms with adjustable rear multi-link suspensions require rear camber and toe to be set before the front, because the thrust angle changes the front toe reading. If your alignment printout shows a thrust angle that isn't within spec, chase the rear first.
Can a car accident mess up your alignment?
Yes — and not just when a wheel takes a direct hit. A collision transmits force through the chassis, and that force moves things that shouldn't move. A side impact can shift the subframe laterally by several millimeters. A rear hit can change the thrust angle, which throws off the way the car tracks even though the front wheels were never touched. Even a low-speed impact against a curb or a curb-height object can bend a tie rod or a control arm enough to pull the alignment out.
What most people don't realize is that the misalignment might not show up immediately. You might drive away from the shop with a car that feels fine and only notice the pull three weeks later when you're on a long highway trip. That's why a post-collision alignment check belongs on every repair estimate — not just for vehicles with visible suspension damage.
| Symptom | Likely cause | Order of check |
|---|---|---|
| Steering wheel off-center | Toe misalignment | Check toe after camber/caster |
| Pull to one side at speed | Caster or thrust angle | Check caster, then rear thrust |
| Uneven tire wear | Camber out of spec | Check camber before toe |
| Car feels "crooked" even when aligned | Riding rail kit or subframe shifted | Rail alignment before anything else |
How to pull a car frame straight
Frame straightening is not a heroic yank with a chain and a tree. It's a series of controlled, measured pulls on a frame bench with the vehicle anchored at OEM hold-down points. The core principles apply to any structural pull, including the riding rail kit mounting area.
- Anchor at OEM points only. Random anchor locations twist the shell and create new damage.
- Pull in the direction of the original impact. Reverse the force that caused the damage — don't work against it.
- Use a load cell and stop at the OEM maximum pull force. Exceeding it stretches metal beyond recovery.
- Measure between pulls, at rest. Never chase a loaded reading.
- Section and replace what won't pull. A kinked rail, a torn mounting point, or a rail that's moved more than a few millimeters longitudinally is a replacement, not a straightening.
When riding rail kit mounts can't be saved
If the mounting points of the riding rail kit have torn, cracked, or deformed the surrounding metal, no pull will fix it. You're looking at a section replacement following the OEM sectioning procedure — cut at the manufacturer's marked sectioning point, butt-weld with the correct filler, and re-verify the geometry with a control point measurement afterward. Cutting anywhere else changes the crash energy path and voids the repair's structural integrity.
The alignment check that catches what everyone misses
Before you roll the car onto the aligner, put a straightedge along the riding rail kit mounting face and confirm it's square to the vehicle centerline. Then measure the OEM control points before you touch a single cam bolt.
Those two checks catch the problem 80% of the time — the misalignment everyone else chases for hours because they started at the wrong end of the process.
And if the rail is kinked, or the mounting points are torn, no amount of alignment skill saves you. The rail has to be right first. Everything else is downstream.


