

The first hard frost catches people out every year. Not because it's early—it arrives when it always does—but because a riding rail kit that worked flawlessly in September goes stiff and gritty by the first week of November, and nobody noticed the warning signs in October. I've watched a sliding gate trolley seize solid after a cold snap because a single drainage hole was clogged with wet leaves. The fix took twenty minutes. The gate being stuck open for two days took considerably longer.
So here's a working autumn routine for anyone maintaining a riding rail kit—the rail-and-trolley assembly that carries a sliding load along a fixed track. Call it a riding rail kit fall maintenance preparation guide, if you want. Below you'll find the actual checks I run, the tolerances that matter, and the mistakes I made learning them.
Key Takeaways
- Autumn preparation for a riding rail kit is mostly about water and debris, not the mechanical parts.
- Check trolley free play and rail flatness with a straight edge—not by eye.
- Lubricant choice changes with temperature; a summer grease can turn near-solid in the cold.
- Torque specs come from the manufacturer, never from a forum post.
- Rail-side safety rules (clearances, lockout) apply during maintenance, not just during normal operation.
- Keep a small spare-parts box: worn pads, a spare roller, new fasteners.
Why autumn is the critical moment for your riding rail kit
Summer is forgiving. Warm grease flows, metal expands slightly, and a bit of grit in the track gets pushed aside without protest. Autumn removes all of that slack. Night temperatures drop, condensation forms on cold steel every morning, and the wet leaves that land on the rail stay there because the drainage is already half-blocked.
The mechanism is simple enough to explain. Water sits on the rail head and in the trough. Overnight it freezes, expands, and works its way under fasteners and into the roller bearings. Next morning the trolley runs slightly heavier than it should. Two weeks of that and you're ordering parts.
What actually fails first
In my experience, the order of failure goes roughly like this:
- The drainage path—clogged with leaves, moss, and grit long before anyone checks.
- Roller bearings—contaminated by water and fine grit, running tight.
- Wear pads or sliders—worn down to a fraction of their original thickness.
- Fasteners—loosened by thermal cycling and vibration, not by load.
Notice that the rail itself is last. The rail is the expensive part, and it usually holds up. Everything around it is what costs you an afternoon.
The fall checklist: what to inspect on the rail and trolley
Work through this in order. Don't skip to the trolley—the rail conditions everything downstream.
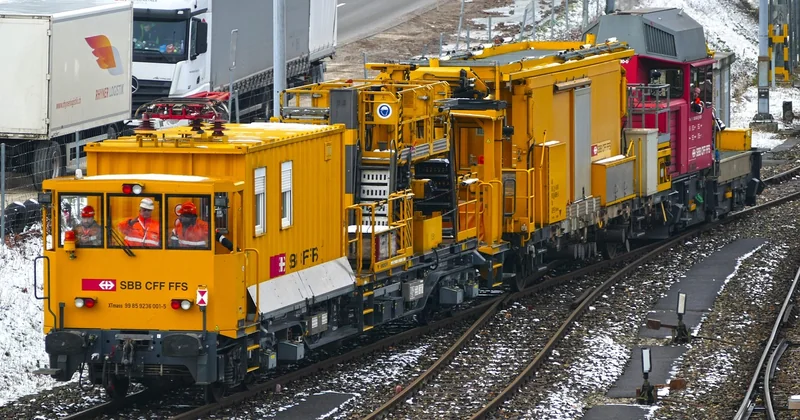
Rail surface and alignment
Run a straight edge along the rail head over its full length. Any gap between the straight edge and the rail is your flatness deviation, and it should stay within whatever tolerance the manufacturer specifies—check the documentation, because it varies by system. A deviation of a couple of millimetres over a couple of metres is usually acceptable; a visible dip is not.
Clean the rail head with a stiff brush and a degreaser before you check anything. Grease and leaf residue hide pitting, and pitting is where corrosion starts. I learned that the hard way: a rail section I'd declared "fine" in October had three small rust craters under a film of old lubricant, and by December the trolley was catching on them.
Trolley, rollers, and free play
Disconnect the load if you can, then push the trolley by hand along the full travel. It should move smoothly with a light, even resistance. Any point where it hesitates, or any sound that isn't a clean roll, needs investigating.
Check lateral free play at the trolley. Lift the trolley slightly and feel for movement—a small amount is normal; a noticeable rattle means worn rollers or a loose adjustment. Measure it if the manual gives a figure. If it doesn't, and the rattle is audible, replace the worn parts anyway.
Fasteners and torque
Every rail fixing and every trolley bolt gets checked with a torque wrench, not a ratchet and a guess. Torque specifications come from the manufacturer's documentation—I won't give you numbers here because they depend entirely on bolt size, rail profile, and substrate. Getting this wrong is how rails loosen. Check for corrosion on the fastener heads while you're there; a rusted bolt that looks tight may already be a fraction of its original strength.
Lubrication that survives the cold
This is the check most people get wrong. The grease that was perfect in July can become a thick paste at zero degrees. Look at the manufacturer's temperature range on the product itself—most cans and cartridges print it—and switch to a winter-rated lubricant if the range doesn't cover your expected lows. Apply sparingly. Over-lubrication attracts grit, and grit does more damage than a slightly dry roller.
Cleaning and drainage before the first frosts
Cleaning isn't cosmetic here. It's the single highest-value task on the list.
Clear the drainage channels along the rail run completely—leaves, moss, silt, the lot. Flush them and watch the water actually leave. If it pools anywhere, that's the spot that will freeze and lift the rail. I keep a short length of wire and a small trowel in the toolbox just for this, and it takes maybe fifteen minutes on a typical run.
Degrease the rail head and the trolley contact surfaces, then re-lubricate. Wipe the roller seals clean. Don't pressure-wash bearings—you'll drive water past the seals and be worse off than before.
Rail-side safety during maintenance: what you must not skip
If your riding rail kit sits anywhere near live rail infrastructure—a depot, a yard, a shared site—then the maintenance itself is a safety activity, and the rules that govern the track govern you.
What is railway track maintenance?
Railway track maintenance is the scheduled and reactive work that keeps the permanent way—rails, sleepers, fastenings, ballast, switches, and the track geometry as a whole—safe and within tolerance for the trains that run on it. It covers inspection, adjustment, replacement of worn components, and the drainage and vegetation work that keeps the structure stable. If your equipment is installed adjacent to that infrastructure, your autumn checks fall inside the same discipline: you're maintaining a component in a system that has to stay predictable.
What does rule 11 mean in railroad?
Rule 11 is one of the standard general safety rules in North American railroad operating practice, and the core of it is this: when you are on or near the track, you must expect a train at any time, in any direction, on any track. Never assume a track is out of service. That expectation applies the moment you step onto the rail bed with a tool in your hand, and it should shape how you plan any work near the track—including checking whether your site requires formal track protection or a lookout before you start.
What are 9 basic safety tips to remember when around a railroad track?
If you're working near a railroad track, keep these nine in mind: never walk or stand on the rails themselves; cross only at designated crossings; expect a train on any track at any time, in either direction; stay clear of switches and moving points; never step over or under stationary rail vehicles; keep well back from the edge of the platform or track bed; avoid headphones and phone use so you can hear and see what's coming; obey every sign, signal and barrier; and never assume a quiet track is an abandoned one.
How to clean railroad tracks?
For the running surfaces of a track, cleaning is normally a specialised job using rail-bound equipment and approved methods—it isn't something you improvise by hand near live rail. What you can reasonably do yourself is keep the drainage and the immediate surroundings clear: remove leaf litter and vegetation from channels and cess, clear debris from the cess and drainage, and leave the running surface to the qualified team. On your own riding rail kit, cleaning means brushing, degreasing, flushing the channels, and relubricating—never pressure-washing into bearings.
Lockout and exclusion zones
Isolate the movement before you touch anything—lock it out if the trolley is powered or automated. Set a perimeter if the rail runs over a public path. Wear the right gloves, eye protection, and footwear; a rail bed is uneven ground. If your site requires a competent person to authorise work near the track, get that authorisation before the tool box opens, not after.
Temperature, lubricant and parts choices compared
The differences below are the ones I've found matter most in practice. Treat the temperature columns as rough categories—check your own product data for exact figures.
| Item | Summer-suitable option | Cold-weather option | What to watch for |
|---|---|---|---|
| Rail/trolley grease | Standard lithium grease | Low-temperature rated grease | Check the temperature range printed on the cartridge |
| Roller bearings | Sealed units, standard | Same, but inspected and re-greased | Water ingress past worn seals |
| Wear pads | Original thickness | Replace once below the manufacturer's wear limit | A few millimetres of remaining material is already late |
| Fasteners | Standard plated | Replace corroded ones | Rusted heads hide reduced strength |
The pattern is clear: it's not about buying a different kit for winter. It's about swapping the consumables—grease, worn pads, corroded bolts—before the cold makes the consequences expensive.
What I got wrong (and what to do instead)
Two mistakes stand out. The first was trusting a visual inspection over a straight edge. The rail looked fine; the trolley was binding on a dip I simply couldn't see against the light. A straight edge found it in a minute.
The second was over-greasing "to be safe." That's not safety—it's grit collection with extra steps. Apply what the manual specifies, wipe off the excess, and accept that a roller doesn't need to look wet to be protected.
One more, less dramatic: I once left a spare roller sitting in an unheated shed all winter. Come spring, the seal had perished. Spares belong indoors, in a dry box. It sounds trivial until you need one.
A short fall-to-winter sequence
If you want a practical order of operations, this is how I run it now:
- Early autumn: clear all drainage, brush and degrease the rail head, clean out gutters and channels.
- Mid autumn: full inspection—straight edge, free play, torque check, pad thickness.
- Before the first frosts: switch to cold-rated lubricant, replace worn pads and corroded fasteners, restock the spares box.
- After the first hard frost: run the trolley by hand over its full travel and listen. That one check catches most of what the season throws at you.
Everything above is a habit, not a project. Fifteen minutes in October buys you a quiet winter.
And if the site involves live rail, a word of plain sense: no amount of preparation is worth standing on a track you assumed was quiet. The rule that matters isn't in your manual. It's the one that says expect the train.
The kit will tell you when something's wrong—if you listen before the cold does it for you. The creak you hear in November is an October check you didn't run.


