

Painting riding rail kits for rust protection: what actually works
The first time I repainted a set of riding rail kits, I did everything wrong. I scuffed the metal with a worn sanding sponge, sprayed two cans of cheap gloss black over the existing rust, and told the barn owner it would hold for years. Eighteen months later the paint was peeling off in sheets and the joints had gone orange again. That mistake cost me a weekend and a client, and it taught me more than any product label ever did.
Riding rail kits take a beating that porch railings never see. If you're painting them for rust protection, the rules are different from a decorative railing on a front step. Between the weather, the sand, and the constant rubbing from horses and handlers, you need a system, not just a coat of paint.
Key Takeaways
- Riding rail kits are usually mild steel or galvanized tubing — each needs a different prep approach.
- Skip the sanding step only if you're using a rust converter primer on intact, tightly bonded rust.
- Two thin coats beat one thick coat, every single time, for outdoor metal.
- Spray cans work for small kits; a brush and roller give a thicker film on long runs of tube.
- Full cure takes days, not hours — don't let horses rub against freshly painted rails.
What riding rail kits actually are (and why it matters for paint)
Most people searching for riding rail kit painting instructions are picturing something like a porch railing. That's the wrong mental model. A riding rail kit is a modular system of posts, rails, and connectors sold as a package for arenas, round pens, or paddock fencing. They're built to be assembled and disassembled, which means they have joints, brackets, and bolt holes — and every one of those is a place where water sits and rust starts.
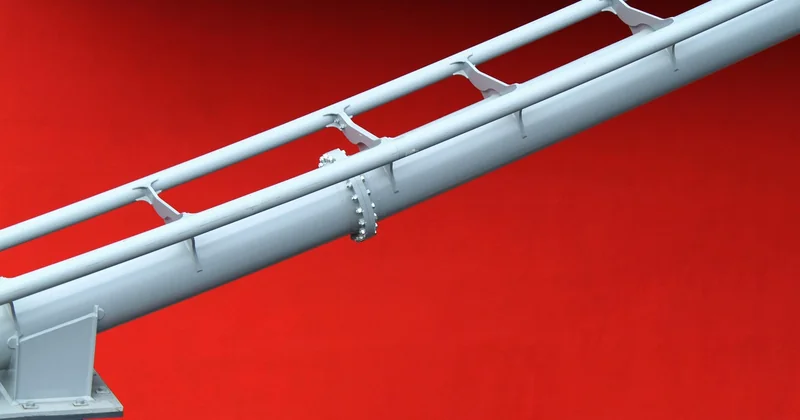
The material matters more than anything else in the painting process. Most kits on the market fall into two groups:
- Mild steel — strong, affordable, and rusts fast the moment the factory coating fails. Needs a real primer.
- Galvanized steel — a zinc coating protects the steel underneath, but paint adheres poorly to fresh galvanizing unless you treat it first.
- Powder-coated kits — common on higher-end sets, and the hardest to repaint because the existing coating is tougher than most paint you'll apply over it.
I've owned all three. The galvanized set I bought in 2021 has held up with almost no maintenance. The mild steel kit from the same era has been repainted twice. If you're buying new and rust is your main concern, galvanized is the answer — but if you already own a steel kit, painting it properly is absolutely worth the effort.
How do you know what you're working with?
Scratch a hidden spot with a knife. If you see a dull grey metallic surface under the paint, it's likely galvanized. Bright silver and no paint at all means bare steel — paint it immediately. If the surface is thick, hard, and slightly waxy, it's powder coat.
Prep work decides everything
Here's the truth most product labels won't tell you: eighty percent of a rust-protection job is prep. The paint is the easy part. If you rush the prep, you'll be back at it within two years, and I say that from experience.
Removing loose rust and old paint
Wire brush, sandpaper, or a wire wheel on a drill — pick whichever you have. What matters is removing anything that's flaking, lifting, or chalky. Rust that's tightly bonded to the metal can stay, provided you're using a rust converter or a primer designed to go over it.
For joints and bolt holes, a small wire brush gets into the crevices better than sandpaper. Take the extra time here. Rust hides in corners.
Degreasing before paint
Oil, dust, and horse sweat all prevent paint from bonding. Wipe every surface with a degreaser and a clean rag, then let it dry fully. I use a simple household degreaser diluted in warm water, then a final wipe with mineral spirits or denatured alcohol. Skip this step and you'll watch your paint bubble off in patches within a season.
Can you paint metal railings without sanding?
Yes — if the existing coating is intact and firmly bonded, and you're using a primer designed for glossy or previously painted surfaces. A bonding primer or a rust-converting primer can go straight over clean, sound metal without sanding. But "intact" is doing a lot of work in that sentence. If there's any flaking, bubbling, or exposed rust, you have to remove the loose material first. No primer on the market will hold a failing coating in place.
Choosing the right paint for outdoor metal
Walk into any hardware store and you'll see a wall of cans all claiming to stop rust. Here's how I sort them, based on what's actually worked on my kits.
| Product type | Best for | Durability | Ease of application |
|---|---|---|---|
| Rust converter primer | Metal with surface rust still bonded | Good, 3–5 years | Brush or roller |
| Epoxy primer + topcoat | Heavy outdoor exposure | Best, 6–10 years | Needs proper mixing |
| Direct-to-metal enamel | Small kits, quick jobs | Moderate, 2–4 years | Brush or spray |
| Spray paint (rattle can) | Touching up, tight areas | Short, 1–3 years | Fast but thin film |
| Powder coat (professional) | New builds, high-wear zones | Excellent, 10+ years | Not DIY |
For most riding rail kits, I reach for an epoxy primer followed by an acrylic or alkyd enamel topcoat. That combination handles UV, moisture, and abrasion better than any single-product solution. If you're just touching up a few spots, spray enamel is fine. If you're doing a full repaint, don't cheap out on the primer.
What's the best paint for metal railings in black?
Black is the most common color for rail kits, and it hides rust stains better than light colors. Look for a black enamel specifically formulated for exterior metal — not interior trim paint. Satin or semi-gloss finishes clean up easier than flat, and they show fewer scuffs from hooves and equipment. Flat black looks great for about six months and then shows every rub mark.
Is indoor paint different from outdoor paint?
Yes, and this trips people up. Indoor metal paints often skip the UV stabilizers and mildew resistance that outdoor formulations include. If your rail kit lives in a covered arena, you can sometimes get away with an indoor-rated enamel, but for anything exposed to sun and rain, use an exterior product. The price difference is small and the lifespan difference isn't.
Application technique: spray vs. brush
Both work. The right choice depends on your kit.
- Spray is fast and reaches into brackets and connectors without drips, but it lays down a thinner film and wastes product on windy days.
- Brush and roller push paint into the metal and build a thicker coat, which matters for rust protection. Slower, and you'll see brush marks on smooth tubing.
- Hybrid approach — brush the joints and connectors, spray the long runs. This is what I do now, and it's the fastest way to get a durable finish.
Whichever method you choose, apply two thin coats rather than one thick one. Thick coats trap solvent underneath, which leads to wrinkling and poor adhesion. Two thin coats dry faster and bond better. Wait the full recoat window listed on the can — usually a few hours, sometimes overnight.
Temperature and humidity matter more than you think
Paint metal when the surface temperature is between 50°F and 85°F. Below that, cure slows dramatically. Above it, the paint flashes too fast and doesn't level. Avoid painting in direct sun on hot days, and never paint if rain is forecast within 24 hours. I've ignored both rules and regretted it both times.
Curing and first use
Here's where most people ruin a good paint job. Paint feels dry to the touch within hours, but it isn't cured. Full cure for exterior enamel takes several days, sometimes a week in cool weather. During that window, the finish is soft and easily damaged.
Keep horses and equipment away from freshly painted kits for at least 72 hours, longer if the weather is damp or cool. I know it's inconvenient. I also know what a hoof print looks like baked into a finish that should have lasted five years.
What about rust that comes back through the paint?
If rust bleeds through within a season, the prep failed — not the paint. Rust that wasn't fully converted or encapsulated will keep spreading underneath a sound-looking topcoat. Strip back to bare metal in that area, treat it with a converter, and start over on that section.
Maintenance that keeps rust away
No paint job lasts forever on a working rail kit, but you can stretch it considerably:
- Touch up chips and scratches immediately — rust starts within days, not months.
- Rinse salt and mud off after winter, especially if your area uses road salt nearby.
- Inspect joints and connectors each spring — that's where water collects and rust begins.
A well-painted kit with an epoxy primer should give you five to eight years of protection. A rush job with a single spray can gives you one or two. The difference isn't the product on the shelf — it's the afternoon you spend on prep.
And honestly? That first kit I botched is still standing in my paddock, repainted twice since. The rust never fully won, because I eventually learned to slow down. Your rails will tell you the same thing mine did.


