

Riding rail kits and off-road technique: the upgrade that changes how you drive, not just how the truck looks
Most people install a riding rail kit for one reason: their rocker panels are already dented, or they're one bad line away from it. Then they drive exactly the same way they did before, and the rails become expensive decoration.
That's the mistake I want to talk about. A rail kit—a real one, bolted to the chassis, not the plastic running boards that came from the factory—changes what lines you can take, how you position your wheels on obstacles, and how much risk you're willing to accept on a trail you've never run before. But only if you actually change your technique to match.
I've watched people spend serious money on sliders and then approach the same rutted climb with the same timid wheel placement they used on a stock crossover. The hardware was fine. The driving wasn't.
Key Takeaways
- Rock sliders and running boards are not the same thing—one is a step, the other is a structural shield. Confusing them costs bodywork.
- A rail kit protects your rocker panels, but it does nothing for your breakover angle. That's still on your wheel placement and line choice.
- Chassis-mounted rails with proper load distribution are worth the extra cost over body-mounted cosmetic bars.
- Your driving technique has to adapt: tighter lines, deliberate tire placement, and slower momentum over obstacles.
- Adding rails changes your vehicle's weight and sometimes its clearance. Reassess your approach before your next trail day.
What is a riding rail kit, really?
A riding rail kit is a set of bars or rails that mount along the lower sides of your vehicle, below the doors and above the rocker panel. That's the neutral definition. What matters is how it's built and where it attaches.

Running boards versus rock sliders: the distinction that matters
Factory running boards exist so people can climb into a tall SUV. They're usually aluminum or plastic, mounted to the body, and they fold or crack the first time a rock pushes up against them. They look like protection. They aren't.
Rock sliders are the functional version. They mount to the frame or to reinforced body points, they're built from thick-wall steel or heavy aluminum, and they're designed to take the full weight of the vehicle resting on a rock. Some of them double as a step. Most of them don't care whether you find them convenient.
Here's the practical difference on a trail: a running board gets crushed and takes your door with it. A slider gets scratched, and you keep driving.
The catch? A slider that isn't mounted to something structural is just a heavier running board. I've seen bolt-on kits that attach to sheet metal with four small brackets. Those will bend on the first serious obstacle, and when they bend, they can push into the body panel they were supposed to protect.
Steel or aluminum—which one should you pick?
Steel is cheaper, easier to repair in the field, and heavier. Aluminum costs more, saves weight, and tends to gouge rather than slide. On a lighter vehicle, aluminum makes sense. On a heavy pickup that already carries a winch and a rooftop tent, steel is the honest answer.
Wall thickness matters more than material choice. A thin-wall steel tube dents just as easily as aluminum. Ask about wall thickness before you ask about brand.
How a rail kit changes your off-road driving technique
This is the part nobody writes about, and it's the reason the topic exists at all.
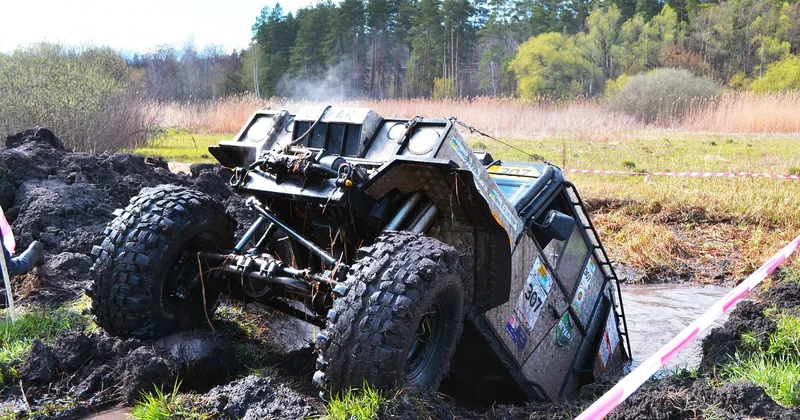
Once you have real protection along your rockers, you can take lines that would otherwise end your day. But taking those lines requires you to drive differently, and that's where most people stall.
Tire placement becomes the whole game
On a rocky section, your job is to put your tires on the high points and let the rails skim the low ones. That means slowing down—genuinely slowing down, to walking pace—and getting out of the vehicle to look at the line before you commit.
I'll admit I skipped this step for a long time. I'd eyeball a rock garden from the driver's seat, pick what looked like the obvious line, and drive it. It worked fine on mild trails. Then I bent a slider bracket on a section I hadn't walked, and spent the next hour with a ratchet strap trying to pull it back into shape.
Walk the obstacle. Look at where your differentials sit. Look at how much clearance you have between the rail and the rock. Then drive it at a pace that lets you stop if the line goes wrong.
Breakover angle: the number rails don't fix
Your breakover angle is the measurement between your front and rear tires at the lowest point of your undercarriage. Rocks in that zone will contact whatever hangs lowest—often your transfer case skid or your exhaust.
A rail kit sits outboard, not underneath. It does not improve your breakover angle. What it does is protect the rocker panels when the vehicle tilts sideways against an obstacle, which is a different failure mode entirely.
Confusing these two things is common. I've heard people say their sliders "let them take harder lines" as if the sliders lifted the truck. They don't. You take harder lines because your bodywork is no longer the limiting factor when you lean into a rock, not because the vehicle suddenly clears more ground.
Momentum control over obstacles
New drivers either crawl too slowly and stall, or hit obstacles with too much speed and bounce. Rails give you a useful middle ground: you can approach a ledge with enough momentum to climb, knowing that if the rail contacts the rock, nothing important gets crushed.
That confidence is worth something. But confidence without technique is just a faster way to damage something else—your driveshaft, your oil pan, your bumper.
Choosing a rail kit: what actually matters
Forget the marketing photos. Here's what I look at.
| Feature | What to look for | Why it matters |
|---|---|---|
| Mounting points | Frame-mounted or reinforced body mounts with multiple attachment points | A two-bolt cosmetic bar bends; a properly braced one holds |
| Wall thickness | Thick-wall tubing or formed steel plate | Thin wall dents on contact and can push into the body |
| Step surface | Textured top plate if you need a step | Bare tube is slippery when wet or muddy |
| Jack points | Flat sections or built-in hi-lift slots | Lifting from a round tube with a hi-lift is genuinely dangerous |
| Weight added | Compare against your payload budget | Heavy rails plus gear can eat most of your remaining capacity |
| Angle added | How far the rail protrudes from the body | Tighter to the body means fewer hang-ups but less step room |
Two things on that table deserve more attention than they usually get.
Jack points are the difference between a rail kit that helps you on the trail and one that just protects paint. If you need to change a tire on uneven ground or lift a corner to stack rocks under a wheel, a hi-lift needs a stable, flat contact surface. Round tube is not that surface.
Protrusion angle is a genuine trade-off. Rails that sit tight against the body reduce your risk of catching them on rocks, but they also make it harder to use them as a step. Rails that stick out far are easier to climb into but hang up more. Pick based on what you actually do most.
Vehicle compatibility: what fits what
Rail kits exist for most body-on-frame SUVs and pickups, and increasingly for unibody crossovers—though the unibody options are usually lighter-duty and mount differently.
Before you buy, confirm three things: whether your vehicle has a separate frame, whether the kit bolts to that frame or to the body, and whether the kit requires drilling. Some kits reuse existing holes. Some need you to drill into the frame, which is a job you want to do carefully or hand off to a shop.
If you drive a lifted vehicle, mention that when ordering. Suspension geometry changes how rails sit relative to the body, and a kit designed for stock height can end up looking and functioning wrong after a lift.
Common mistakes I've made and seen others make
Three of these are mine. The rest I've watched happen in parking lots and on trailheads.
- Buying the cosmetic version and calling it protection. If it's described primarily as a step, it's a step.
- Installing rails and immediately running a harder trail. Give yourself a session or two on familiar ground to learn where the rails sit relative to your normal wheel placement.
- Ignoring the weight. A full set of steel sliders plus mounting hardware can add meaningful mass low on the vehicle. That's good for center of gravity and bad for payload.
- Not checking the exit angle. Some kits extend past the rear wheel opening. On steep drop-offs, that extension can catch.
- Mixing rail kits with body lifts without checking clearance. Gap changes; contact points change.
- Assuming sliders replace skid plates. They protect different areas. You want both if you're running rocky terrain.
That last one causes more damage than any of the others. Sliders shield your rockers. Skid plates shield your transfer case, fuel tank, and engine. Neither substitutes for the other.
Do you need a rail kit as a beginner?
Probably not yet.
If you're new to off-roading, your first upgrade should be tires and your first skill should be reading terrain. Rails protect a specific part of the vehicle against a specific kind of damage—side contact with rocks and ledges. If you're driving graded dirt roads and mild forest tracks, you won't touch them.
Once you start running trails with ledges, tight rock sections, or any route where you're picking a line around obstacles rather than driving straight through, the calculation changes. That's when the cost of a good kit looks small compared to the cost of bodywork.
My honest advice: run a few moderate trails first. Note where you scrape, where you hesitate, and where you get out to look. If the answer keeps coming back to "the sides of the vehicle," buy the rails. If it's "I keep hitting my undercarriage," buy skid plates first.
The upgrade is the driving, not the hardware
A rail kit doesn't make you a better off-road driver any more than a good pair of boots makes you a better hiker. What it does is remove one specific failure mode from your list, which frees you to focus on the ones that remain.
The drivers I've learned the most from aren't the ones with the most armor. They're the ones who get out and look before every hard section, who keep their speed low enough to stop, and who treat every obstacle like a problem to solve rather than a challenge to win.
Rails help. But the technique is what keeps you moving.


