

Riding rail kit installation on a Ford F-150: what the videos skip
The first time I drilled into a truck bed, I stopped three times to check that I wasn't about to hit the fuel filler neck. Two hours later, the rails were on, the fifth-wheel plate was seated, and I finally understood why nobody on YouTube shows you the underside. Riding rail kit installation on a Ford F-150 is a 3-to-5 hour job for a patient owner with basic tools, and roughly half of that time is spent underneath the truck with a flashlight, not in the bed with a torque wrench.
That part matters more than the drilling itself. Ford's bed floor is thin stamped steel sitting above a fuel tank, a wiring harness, a spare tire hoist, and — on the Lightning — a high-voltage battery pack. Get the placement wrong on a PowerBoost and you're drilling toward a fuel line. Get it wrong on a Lightning and you shouldn't be drilling at all.
Key Takeaways
- Bed length and cab configuration decide everything: the same "F-150 rail kit" fits a 5.5 ft bed, a 6.5 ft bed, or neither, depending on generation.
- Torque values are not optional. Undertightened rail bolts shear under a loaded fifth-wheel; overtightened ones deform the bed floor.
- Reinforcement plates (backing plates under the bed) are the difference between a rail that holds and a rail that pulls through sheet metal.
- The Lightning and PowerBoost have components under the bed that change — or eliminate — your drilling plan.
- Dealer install runs roughly 2-3x the parts cost. The labor rate is the reason, not the complexity.
- Any hole you drill is a warranty conversation if the bed later rusts at that point.
Before you drill anything: what's actually under an F-150 bed
Slide under the truck with a light before you buy a single bolt. The underside of an F-150 bed is an obstacle course, and it changes with the drivetrain.
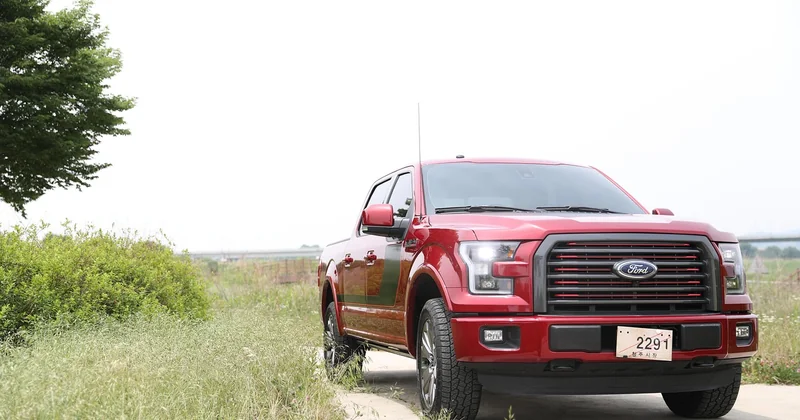
What changes with your configuration
On a standard gas F-150, you have the spare tire winch assembly roughly centered under the rear of the bed, a fuel tank forward of that, and the wiring loom for tail lights and trailer connector running along the driver's side frame rail. Rails mount inboard of the wheel wells, so the conflict zones are usually the wire loom and, on some wheelbases, the fuel filler hose.
Add the PowerBoost hybrid and you introduce a battery pack and additional high-voltage wiring near the rear. On the F-150 Lightning, there's no fuel tank because there's no engine, but the battery enclosure occupies a substantial band under the bed floor. Ford's own accessory documentation puts the Lightning in a different kit category for this reason, and some rail systems are listed as incompatible. If you own a Lightning, confirm compatibility with the specific kit number before ordering. I've watched a guy on a forum buy rails, drive 90 minutes to pick them up, and discover the kit wasn't rated for his truck.
Raptor owners get a separate wrinkle. The Raptor's bed is the same 5.5 ft box as a SuperCrew short bed, but the frame and shock mounting differ, and some rail kits list the Raptor as a distinct fitment. It's not marketing noise — the underbed geometry genuinely differs.
The backing plate question nobody asks
Here's the thing that separates a rail kit that lasts from one that doesn't: backing plates. A rail bolt through 20-gauge bed sheet metal has almost nothing to bite into. Under load — a fifth-wheel pin weight of 1,500-2,000 lbs bouncing down a highway — that metal fatigues.
Good kits ship with reinforcement plates that spread the load across a wider area. Cheap ones don't. If you're buying used rails off Marketplace (and a lot of people do), check whether the plates came with them. Missing plates are the single most common reason a used kit turns out to be a bad deal.
Tools, time, and what this actually costs
Most people underestimate the tool list. You don't need a lift, but you do need more than a drill and a socket set.
- Drill with a chuck that takes a step bit, plus a right-angle adapter for the tight spots near the frame rail
- Center punch — I skipped this once and my first hole wandered 4mm off the mark. Had to slot it. Never again
- Step bit (unibit) rather than a twist bit; sheet metal grabs and spins a twist bit badly
- Torque wrench rated to at least 100 ft-lbs. This is not the place for "good and tight"
- Anti-seize compound and a tube of silicone or urethane sealant for every hole you cut
- Wire brush and touch-up paint for the bare metal edges
- Floor jack and stands, or ramps, so you can actually get under there with room to work
- A helper for the 20 minutes where you're holding a rail and a backing plate while trying to start a bolt
Honest time estimate: 3 hours if nothing goes wrong, 5-6 if it does. The drilling takes 30 minutes. Positioning, checking clearance, and re-checking clearance takes the rest. I've done this twice on different trucks and the second time still took me four hours, because I spent 40 minutes arguing with myself about whether the front rail was far enough forward to clear the cab.
What it costs, broken down
| Route | Parts cost | Your time | Notes |
|---|---|---|---|
| New name-brand rail kit, self-install | $250-$450 | 3-6 hours | Includes brackets and hardware; check for backing plates |
| Used kit from a forum or Marketplace | $80-$200 | 4-7 hours | Often missing plates, hardware, or the specific bolts |
| Dealer or shop install | Parts + labor | Drop-off day | Labor typically doubles or triples the parts figure |
| Universal rails (not vehicle-specific) | $100-$180 | 5-8 hours | You're fabricating fitment; drilling patterns rarely line up |
Those parts figures are what I've seen shopping for my own trucks and browsing used listings — your local pricing will move with region and availability. The pattern holds regardless: the labor line is where dealer quotes jump.
The installation sequence, step by step
Every kit has its own instructions, and you should follow them over anything I write here. But the sequence that works is roughly the same across brands.
Measure twice, mark once, then argue with yourself
Set the rails in the bed where the instructions say. Then measure the distance from the front rail to the cab-side bed wall, and from the rear rail to the tailgate end. Write the numbers down. Climb under and confirm those positions clear the frame, the loom, and any tank or battery structures.
If the numbers don't clear, don't "make it work." Move the rail. A rail 10mm off the recommended position is fine. A rail directly above a wiring loom is a future electrical fault you'll spend a weekend chasing.
Drill, treat the metal, seal the hole
Center punch. Step bit. Slow speed, steady pressure. As soon as you break through, stop and vacuum the shavings out of the hole — steel filings in a truck bed become rust stains within a season.
Then do the step almost nobody does: paint the bare edge of every hole with touch-up paint, let it flash, and apply sealant to the rail's underside flange before you bolt it down. This is a 15-minute addition that decides whether your bed floor looks clean in five years or grows rust rings around each bolt. I learned this after watching a friend's truck develop exactly those rings.
Torque in stages, not all at once
Run all bolts finger-tight first. Then snug them in a cross pattern — front-left, rear-right, front-right, rear-left — in two or three passes rather than one full-torque pass on each bolt. This seats the rail flat instead of pulling one corner down and bowing the rail.
Your kit's specified torque is the number that matters, and you should use it. Generic guidance for this class of hardware lands in the 40-70 ft-lb range depending on bolt diameter and grade, but rail kits vary enough that guessing is how you strip a captured nut inside the bed structure. If your kit's instructions are missing or unreadable, contact the manufacturer for the value rather than defaulting to a number from a forum.
One more thing: re-check torque after your first 100 miles with the trailer attached. Things settle.
What about the fifth-wheel or gooseneck itself?
Rails are the foundation, not the whole system. Once the rails are in, the fifth-wheel head or gooseneck ball mounts to them, and that connection has its own torque spec and its own inspection interval. The rail install is done correctly when the mounting system sits flat, sits level, and doesn't rock when you push on it with the truck parked. If it rocks, your rails aren't seated and you need to back the bolts off and start the staged torque again.
Rail kit vs gooseneck vs universal rails
You have three real options, and the "best" one depends on what you tow and how often.
Vehicle-specific integrated rail kit
This is the cleanest option for most owners. The kit is designed for your bed length and generation, the hardware fits, the backing plates are there, and the install is measured in hours rather than days. The tradeoff is that the rails live permanently in your bed floor, taking up space and catching cargo when you're not towing.
Gooseneck ball system
If you tow a gooseneck trailer, you'll want a ball system rather than rails — and the good ones install under the bed with only a small cutout in the floor. Cleaner bed, more fabrication, higher cost. Some owners run a rail kit plus a gooseneck adapter, which is a compromise that works but adds a joint to a load path. Every joint is a place things loosen.
Universal rails
My honest opinion: skip these on an F-150 unless you enjoy fabrication. The whole point of buying a truck-specific kit is that the hole pattern is already solved. Universal rails mean you're laying out your own pattern, you get no reinforcement plates sized for your bed, and you'll probably drill more holes than you need. On a truck that you'll sell someday, extra holes are a negotiating liability.
The comparison that actually matters: integrated kit for the F-150 owner who tows a fifth-wheel a few times a year, gooseneck ball for anyone towing gooseneck regularly. Universal rails only make sense if you're fitting something unusual and know why.
Mistakes I made, and the warranty conversation
My first install, I didn't use backing plates on the front rail. Six months later, with a loaded fifth-wheel, I noticed the rail had started to show a slight depression in the bed floor around the front bolts. Not a failure — but the beginning of one. I pulled the rail, added plates, and the depression stopped growing. Lesson cost me an afternoon and the price of plates.
The other mistake: I drilled before I'd fully checked the rear rail against the spare tire hoist. Missed it by maybe 15mm. No damage, but I had to relocate the rail, which meant an extra set of unused holes. Those holes are still there. Every time I wash the truck, I see them.
On warranty — and this is worth stating plainly — any hole you drill in the bed floor is a modification. If the bed later develops corrosion at a drilled point, that's on you, not Ford. If your truck is under a rust or corrosion warranty, drilling can affect coverage for that specific area. This doesn't mean don't do it; it's a common, well-understood modification. It means treat every hole like it's permanent, because it is.
Does installing rails void my F-150 warranty?
It doesn't void your warranty wholesale. In the US, the Magnuson-Moss Warranty Act means a manufacturer can't void coverage for unrelated parts of the vehicle just because you modified something. But they can decline a claim if they can show your modification caused the failure. A drilled hole that rusts is directly attributable to your drilling. A transmission failure two years later is not.
Do I actually need backing plates?
If you're towing anything with meaningful pin weight, yes. Plates spread load across the bed floor and frame. Kits from reputable brands include them because the engineers who designed the system know what sheet metal does under cyclic load. If your kit arrived without them, buy them separately before you install.
What nobody tells you about the job
The drilling is the easy part. The positioning is the skill. The sealing is the discipline. And the part everyone glosses over is the waiting — waiting for paint to flash, waiting to re-check torque, waiting 100 miles to confirm nothing settled.
If you take one thing from this: treat the underside of the bed as the real work site and the bed floor as just the surface. The owners who end up with rails that hold for a decade are the ones who spent more time under the truck than over it, with a flashlight, before their drill ever touched metal.
And if you own a Lightning, do that checking before you order anything. That's the one truck where the answer might legitimately be "not this kit."


